Recent Posts
Why Choosing a Local Fire Damage Restoration Company Makes All the Difference
12/11/2024 (Permalink)
Experiencing a fire in your home or business can be devastating, both emotionally and financially. Once the flames are extinguished, the real work begins—restoring your property to its pre-fire condition. When it comes to fire damage restoration, one of the most important decisions you’ll make is choosing the right company for the job. While there are many national restoration companies, opting for a local fire damage restoration service offers a range of benefits that can make the recovery process smoother and more efficient.
1. Faster Response Time
After a fire, time is of the essence. The sooner restoration efforts begin, the more likely it is that further damage from smoke, soot, and water can be mitigated. Local fire restoration companies are typically able to respond faster than large national companies because they’re located within the community. They know the area well and can navigate efficiently, allowing them to start the restoration process as quickly as possible. This is especially important during emergencies, where delays could lead to more extensive damage.
2. Personalized Service
Local fire damage restoration companies are often more invested in their community and their customers. They take pride in offering a more personalized service because they understand the unique needs of the area. Whether you’re dealing with residential or commercial fire damage, a local company will be more attuned to the specific challenges faced by homes or businesses in your region. This allows them to provide tailored solutions that fit your exact situation, rather than using a one-size-fits-all approach.
3. Familiarity with Local Regulations and Insurance Requirements
Restoration projects often involve complying with local building codes, permits, and regulations. A local fire damage restoration company will be well-versed in these requirements and can help navigate the paperwork quickly and efficiently. Additionally, they often have established relationships with local insurance companies, which can help streamline the claims process. Their familiarity with the insurance protocols can reduce misunderstandings and make it easier to get the compensation you need for repairs.
4. Supporting Local Economy
By choosing a local fire damage restoration company, you’re also contributing to the local economy. These businesses hire local employees and use regional suppliers, keeping money circulating within the community. Supporting local businesses helps create jobs, strengthens community ties, and fosters a sense of resilience in the face of adversity.
5. Trust and Reputation
Local restoration companies often rely on word-of-mouth recommendations and repeat customers to build their reputation. Because of this, they’re highly motivated to provide excellent service. They know that their long-term success depends on satisfied customers who will refer them to others. This personal investment in the community often leads to higher-quality work and more attention to detail.
6. Accountability and Reliability
When you choose a local fire damage restoration company, accountability is built into the relationship. Local companies thrive on trust and transparency. Since they operate in the same community, they’re more accessible if follow-up services are required. You can count on them to be there long after the restoration is complete, ensuring any lingering concerns are addressed promptly.
While national fire damage restoration companies may have more resources at their disposal, choosing a local company offers unique benefits that can make your recovery process faster and less stressful. From quick response times to personalized service and local expertise, these companies are deeply committed to helping their neighbors rebuild. If you find yourself in need of fire damage restoration, consider a trusted local company like SERVPRO of Harnett County East and Sampson County North, known for its reliable and thorough restoration services within your community.
Mold and Moisture Control in Commercial Buildings: Prevention Strategies and Professional Solutions
11/20/2024 (Permalink)
Mold and moisture can be significant issues in commercial buildings, leading to structural damage and costly repairs if not properly addressed. Mold thrives in damp environments, making moisture control essential to maintaining the integrity and longevity of commercial properties. Without adequate prevention and remediation measures, mold can spread rapidly, especially in large buildings with complex HVAC systems, high foot traffic, and areas that may be prone to moisture buildup.
In this blog, we’ll explore the importance of mold and moisture control in commercial buildings, key strategies for prevention, and how professional remediation services like SERVPRO® can help protect your investment.
Why Mold and Moisture are Serious Threats to Commercial Properties
Commercial buildings are often larger and more complex than residential properties, with many hidden areas where moisture can accumulate unnoticed. Roof leaks, plumbing issues, or improper ventilation can create conditions where mold can flourish. Mold can damage materials like drywall, wood, and ceiling tiles, which may lead to structural issues if not caught early.
In addition to visible damage, mold spores can also spread through HVAC systems, affecting large areas quickly. Without adequate control measures, the cost of repairs can escalate rapidly. This is why mold and moisture control must be a top priority for building owners and facility managers.
Strategies for Mold and Moisture Control in Commercial Buildings
Identify and Fix Moisture Sources
One of the most important steps in preventing mold growth is identifying and fixing sources of moisture. Common causes of moisture buildup in commercial buildings include:
- Leaking Roofs: Water can seep into ceiling materials and insulation, providing a perfect environment for mold to grow.
- Plumbing Leaks: Pipes that are cracked, broken, or not sealed properly can lead to undetected water leaks in walls, ceilings, or floors.
- Poor Ventilation: Inadequate ventilation can result in humidity and moisture buildup, particularly in areas such as kitchens, bathrooms, and basements.
Regular inspections can help identify potential problem areas before they become major issues. Addressing water leaks and ventilation problems immediately can prevent mold from spreading.
Maintain HVAC Systems
HVAC systems play a critical role in regulating moisture levels in commercial buildings. Proper maintenance of HVAC systems helps ensure that excess moisture is removed from the air, preventing mold growth. Key maintenance tasks include:
- Regular filter changes: Dirty filters can restrict airflow and lead to moisture buildup in ducts.
- Routine inspections: Checking for leaks or moisture accumulation in the ductwork can prevent mold spores from circulating through the building.
- Proper dehumidification: In high-humidity climates, using dehumidifiers or adjusting the HVAC system to remove excess humidity is essential..
Improve Building Drainage
Water pooling around the foundation or in other areas of the building can lead to moisture problems inside. It’s important to have a well-designed drainage system to channel water away from the building.
Ensure that:
- Gutters and downspouts are clear and direct water away from the foundation.
- The grading around the building slopes away to prevent water from accumulating near the base.
- Flood-prone areas are protected, especially in regions with frequent storms or heavy rainfall.
Use Mold-Resistant Materials
For areas that are frequently exposed to moisture, such as restrooms, kitchens, and basements, using mold-resistant materials can help prevent mold growth. These materials include:
- Mold-resistant drywall: This type of drywall contains moisture-resistant backing and is less prone to mold growth.
- Mold-resistant paint: Adding mold inhibitors to paint can help prevent mold from forming on surfaces.
- Non-porous materials: Surfaces made from non-porous materials like tile, stainless steel, or treated wood are less likely to absorb moisture and foster mold.
Regular Inspections and Maintenance
Routine inspections and maintenance of your commercial building are crucial for preventing mold. Regularly inspecting high-risk areas, such as basements, storage rooms, kitchens, bathrooms, and HVAC systems, can help catch moisture and mold problems early.
Facility managers should:
- Inspect roofs, windows, and doors for leaks or signs of water damage.
- Check for condensation in areas with temperature fluctuations, like near windows or HVAC equipment.
- Inspect pipes and plumbing systems for signs of leaks, corrosion, or water stains.
The Importance of Professional Mold Remediation
Even with the best prevention strategies, mold can still become a problem in commercial buildings. Once mold has taken hold, it requires professional remediation to completely remove and prevent it from returning.
SERVPRO provides expert mold remediation services tailored to the unique needs of commercial properties. Our team uses advanced techniques and equipment to identify the source of moisture, contain mold growth, and safely remove it from affected areas.
For comprehensive mold remediation services, SERVPRO of Harnett County East and Sampson County North is your trusted partner in restoring your commercial property and keeping it mold-free. With our expertise, we can help you manage mold issues quickly and effectively, ensuring your building remains safe and structurally sound.
Repairing Water-Damaged Walls: A How-To Guide
10/16/2024 (Permalink)
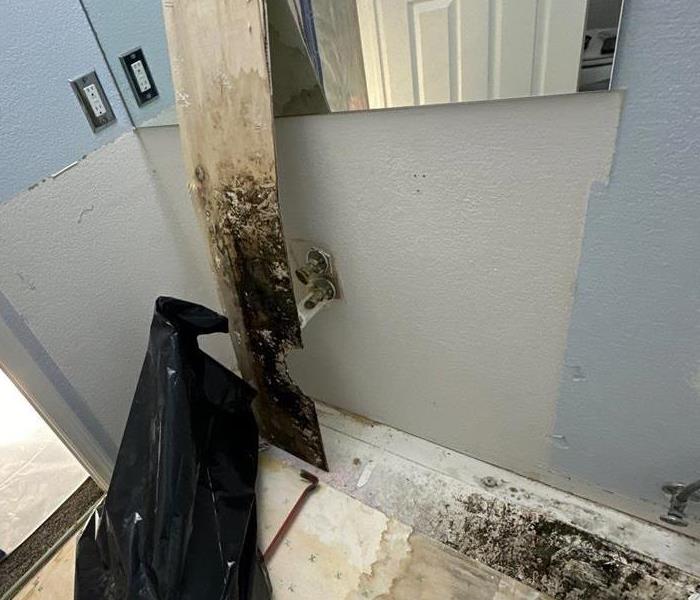
 Our team is ready to help you get your home back to normal as quickly as possible.
Water damage to walls can be a frustrating experience for any homeowner. Whether it's due to a burst pipe, a leaking roof, or flooding, the damage can be extensive if not addressed quickly. In this guide, we’ll walk you through the steps of repairing water-damaged walls, helping you restore your home to its original condition.
Assess the Extent of the Damage
The first step in repairing water-damaged walls is to assess the extent of the damage. Look for signs such as discoloration, warping, bubbling, or peeling paint. In some cases, the damage might be superficial, while in others, it could have penetrated deeper into the drywall or insulation. Use a moisture meter to determine the level of moisture in the wall. If the damage is extensive, it’s advisable to consult a professional restoration service like SERVPRO® to ensure a thorough and safe repair.
Remove the Damaged Material
Once you’ve assessed the damage, the next step is to remove the compromised material. Start by cutting away any visibly damaged drywall. Be sure to cut back to where the drywall is still solid and free from moisture. If the insulation behind the wall is wet, it will also need to be removed and replaced. Removing wet insulation is crucial to prevent further issues, such as mold growth or structural damage.
Dry Out the Area
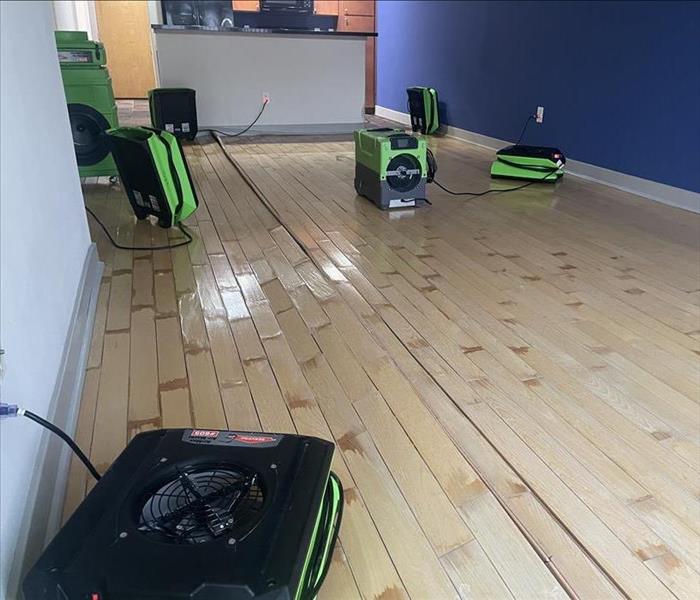
After removing the damaged materials, it's essential to dry out the affected area completely. Use fans, dehumidifiers, and, if necessary, industrial drying equipment to remove all moisture. The drying process can take several days, depending on the extent of the damage and the humidity levels in your home. Proper drying is critical to prevent any lingering moisture that could lead to additional problems down the line.
Repair and Replace
Once the area is completely dry, it's time to repair and replace the damaged sections of the wall. Begin by installing new insulation, ensuring it’s the same type and thickness as the original. Next, cut a piece of drywall to fit the hole you’ve created. Secure the new drywall with screws, and then tape and mud the seams to create a smooth finish. After the mud has dried, sand the area until it’s even with the surrounding wall.
Prime and Paint
The final step in repairing water-damaged walls is to prime and paint the repaired area. Start by applying a primer designed for high-moisture areas, which will help seal the drywall and prevent future damage. Once the primer is dry, apply a coat of paint that matches the rest of the wall. Depending on the paint color and the extent of the repair, you may need to apply multiple coats for an even finish.
Repairing water-damaged walls is a task that requires attention to detail and patience. By following these steps, you can restore your walls to their original condition and protect your home from future water damage. If the damage is extensive or you’re unsure about any part of the process, don’t hesitate to reach out to SERVPRO for professional assistance. Our team is ready to help you get your home back to normal as quickly as possible.
Clearing Gutters and Drains Before a Storm is Essential for Home Safety
9/5/2024 (Permalink)
As storm season approaches, it's crucial to take proactive steps to protect your home from potential water damage. One of the most effective ways to do this is by ensuring your gutters and drains are clear and functioning properly. In this blog, we'll discuss the importance of clearing gutters and drains before a storm, the risks of neglecting this task, and how to properly maintain these systems to keep your home safe and dry.
Preventing Water Damage
- Efficient Water Flow: Clean gutters and drains ensure that rainwater flows away from your home, preventing it from pooling around the foundation.
- Roof Protection: Clogged gutters can cause water to back up under roof shingles, leading to leaks and potential roof damage.
- Basement Flooding: Proper drainage helps prevent water from seeping into your basement, which can cause flooding and significant damage.
Avoiding Structural Damage
- Foundation Issues: Water pooling around the foundation can cause cracks and weaken the structural integrity of your home.
- Soil Erosion: Excessive water flow can erode the soil around your home, potentially damaging landscaping and destabilizing the foundation.
Preventing Mold and Mildew
- Moisture Control: Standing water and excessive moisture can lead to mold and mildew growth, which can cause health issues and damage to your home’s interior.
- Air Quality: Mold spores can affect indoor air quality, posing respiratory risks to occupants, especially those with allergies or asthma.
Reducing Pest Infestations
- Insect Breeding Grounds: Standing water in clogged gutters and drains can become a breeding ground for mosquitoes and other insects.
- Rodent Access: Clogged gutters can provide access points for rodents and other pests seeking shelter from the storm.
Extending Gutter and Drain Lifespan
- Preventing Rust and Corrosion: Debris and standing water can cause gutters to rust and corrode over time, shortening their lifespan.
- Avoiding Costly Repairs: Regular maintenance can prevent the need for expensive repairs or replacements down the line.
How to Clear Gutters and Drains
Gather Necessary Tools
- Ladder: Ensure you have a sturdy ladder that reaches your gutters safely.
- Gloves: Wear gloves to protect your hands from sharp debris and potential pests.
- Trowel or Scoop: Use a trowel or scoop to remove debris from the gutters.
- Garden Hose: Use a garden hose to flush out remaining debris and check for proper drainage.
- Plumber’s Snake: For clogged drains, a plumber’s snake can help remove blockages.
Safety First
- Use Ladder Safely: Always follow ladder safety guidelines, ensuring it’s placed on a stable surface and never overreaching while on the ladder.
- Work with a Partner: If possible, have someone assist you by holding the ladder or handing you tools.
Clean the Gutters
- Remove Debris: Use the trowel or scoop to remove leaves, twigs, and other debris from the gutters.
- Flush with Water: Use the garden hose to flush out any remaining debris, starting from the end furthest from the downspout.
- Check Downspouts: Ensure water flows freely through the downspouts. If blocked, use a plumber’s snake to clear the obstruction.
Inspect and Repair
- Check for Damage: Inspect the gutters and downspouts for any signs of damage, such as rust, corrosion, or loose sections.
- Make Necessary Repairs: Repair or replace any damaged sections to ensure the system functions properly.
Maintain Regularly
- Routine Inspections: Inspect and clean your gutters and drains at least twice a year, or more frequently if you live in an area with heavy foliage or frequent storms.
- Gutter Guards: Consider installing gutter guards to reduce the amount of debris that enters the gutters and make maintenance easier.
Clearing gutters and drains before a storm hits is a crucial step in protecting your home from water damage, structural issues, mold growth, and pest infestations. By taking the time to maintain these systems, you can ensure that your home remains safe and dry during storm season. Don’t wait until it’s too late—Don't wait for a storm to reveal problems with your gutters. Contact SERVPRO of Harnett County East and Sampson County North today to schedule a gutter maintenance service and ensure your home is prepared for any weather.
Where to Check for Mold Before Starting Home Renovations
7/17/2024 (Permalink)
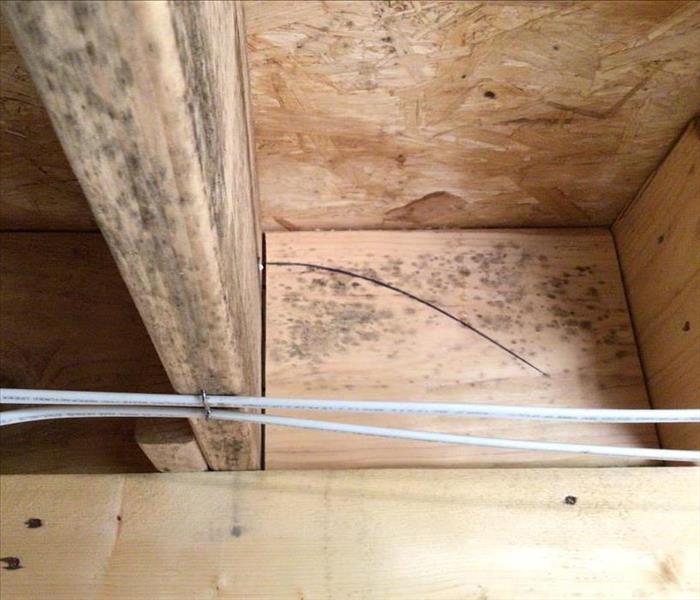 If you suspect mold in your renovation areas or need expert advice, don’t hesitate to contact our professional team.
Starting a home renovation is an exciting venture, but it's crucial to tackle any potential issues before they become bigger problems down the line. One such issue is mold. Mold not only damages your property but can also complicate your renovation plans. Identifying and addressing any mold issues before you begin can save time, money, and hassle. Here’s where to check for mold prior to starting your renovations.
1. Bathrooms and Kitchens
These areas are the most common breeding grounds for mold due to their high moisture levels. In the bathrooms, check around the sink, bathtub, and toilet. Look for any discoloration or black spots on walls, ceilings, and around plumbing fixtures. In kitchens, inspect areas under the sink and around the dishwasher and refrigerator. Don’t forget to examine exhaust fans and ventilation systems that can harbor mold spores.
2. Basements and Crawl Spaces
Basements and crawl spaces often suffer from poor ventilation and water intrusion, which can create ideal conditions for mold growth. Check for signs of moisture or water damage, such as water stains, peeling paint, or warping. Inspect floor joists and behind any stored items where moisture can accumulate unnoticed.
3. Windows and Door Frames
The seals around windows and doors are common places for moisture to enter and get trapped, creating a perfect habitat for mold. Check these areas thoroughly for any signs of mold, mildew, or rot. Pay attention to any soft spots or discoloration in the wood or drywall around these frames.
4. Attics
Attics can be susceptible to mold growth due to roof leaks or inadequate ventilation. Examine the insulation, rafters, and sheathing for any signs of mold or moisture. Be sure to inspect around roof vents and chimneys where leaks might occur.
5. HVAC Systems
Your heating, ventilation, and air conditioning system can distribute mold throughout your house. Check the air ducts, intake vents, and drip pans for any signs of mold. It’s crucial to ensure these systems are clean and functioning correctly to prevent mold spread during and after renovations.
6. Behind Drywall and Paneling
Mold can grow undetected behind walls, particularly if there has been previous water damage. During renovations, it might be necessary to remove sections of drywall or paneling to check for hidden mold. This is especially important if you’ve experienced flooding or have noticed a musty smell in any area of your home.
7. Flooring
Whether it’s carpet, hardwood, or linoleum, the flooring can harbor mold beneath its surface, especially in areas prone to dampness. Before laying new floors or carpet, ensure that the subflooring is thoroughly inspected and treated for any mold or moisture.
Checking these areas for mold before starting renovations is essential for a successful project. Ignoring mold can lead to significant damage and expensive repairs in the future. If you do find mold, it’s advisable to handle it professionally before proceeding. At SERVPRO®, we specialize in mold remediation and can help ensure that your renovation project starts on the right foot.
If you suspect mold in your renovation areas or need expert advice, don’t hesitate to contact our professional team. We’re here to help your renovations go smoothly by tackling the tough issues head-on.
DIY Emergency Water Damage Toolkit: Essential Supplies and Tools
6/12/2024 (Permalink)
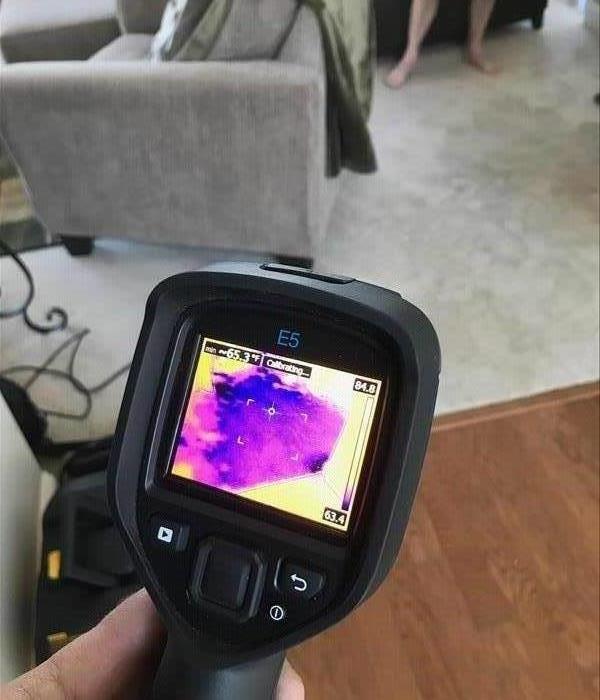 In this blog, we will discuss essential items to include in your DIY water damage toolkit to assist you in handling emergency water damage situations.
Water damage emergencies can happen at any time, and being prepared with a DIY emergency water damage toolkit can help you respond quickly and effectively. Having the right supplies and tools on hand can minimize the impact of water damage on your home or business. In this blog, we will discuss essential items to include in your DIY water damage toolkit to assist you in handling emergency water damage situations.
Wet/Dry Vacuum
A wet/dry vacuum is a versatile tool for removing water from floors, carpets, and other surfaces. It can efficiently extract standing water, preventing further damage and mold growth. Look for a vacuum specifically designed for water extraction, with a strong motor and the ability to handle both wet and dry debris.
Mops, Towels, and Sponges
Absorbent materials like mops, towels, and sponges are essential for soaking up water from hard surfaces. Keep a supply of clean, dry cloths to help remove excess moisture and prevent water from seeping into porous materials.
Fans and Dehumidifiers
Proper ventilation and drying are crucial in preventing mold and mildew growth after a water damage incident. High-powered fans and dehumidifiers can help circulate air and dry out affected areas more efficiently.
Plastic Sheeting and Tarps
Use plastic sheeting or tarps to cover and protect water-damaged furniture, belongings, or areas of your home. This can help prevent further water exposure and provide a barrier between wet and dry areas.
Gloves and Protective Gear
When handling water-damaged materials, it's essential to protect yourself with gloves and appropriate personal protective equipment. This can include rubber gloves, protective eyewear, and, if necessary, respiratory protection.
Moisture Meter
A moisture meter is a handy tool for assessing the moisture levels in building materials such as drywall, wood, and insulation. It can help you determine the extent of water damage and monitor the drying progress as you address the issue.
Sealable Plastic Bags
Use sealable plastic bags to store and transport small, wet items such as documents, photographs, and personal belongings. Properly sealing and labeling bags can help prevent further damage and make it easier to sort and organize items for restoration.
Duct Tape and Repair Materials
Have a supply of duct tape and basic repair materials on hand to temporarily seal leaks, patch minor damages, and secure loose materials until professional help arrives.
Know When to Call Professionals
While a DIY toolkit can be valuable for initial water damage response, certain situations may require professional assistance. If the water damage is extensive, involves contaminated water, or poses safety concerns, contact experienced water damage restoration professionals for comprehensive mitigation and restoration services.
In conclusion, assembling a DIY emergency water damage toolkit with essential supplies and tools can empower you to respond effectively to water damage incidents. However, it's important to remember that safety should always be a top priority, and knowing when to call in experienced professionals is crucial for addressing severe water damage. If you encounter a water damage emergency that exceeds your DIY capabilities, contact SERVPRO® for professional water damage restoration and mitigation services. Our trained professionals have the expertise and resources to handle all aspects of water damage restoration efficiently and effectively.
Creating a Home Inventory for Storm Insurance Claims: A Step-by-Step Guide
5/15/2024 (Permalink)
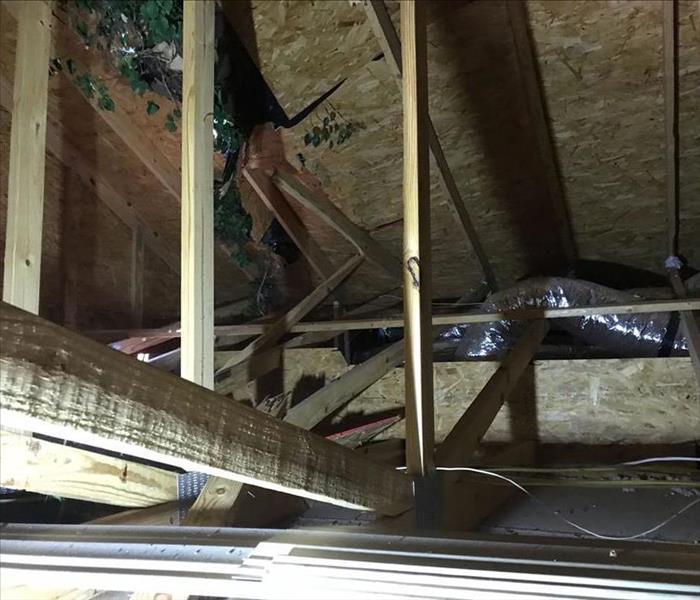 In this blog post, we will explore how to create a home inventory for storm insurance claims and provide a step-by-step guide to follow.
No one wants to think about the potential of a devastating storm emergency, but preparation is essential, and planning can make a significant difference in the aftermath of storm damage. In addition to having a storm damage plan in place, it's crucial to create a home inventory to ensure you are properly covered by your insurance policy. In this blog post, we will explore how to create a home inventory for storm insurance claims and provide a step-by-step guide to follow.
What is a Home Inventory?
A home inventory is a detailed record of all your possessions and their value. It includes information on the make, model, age, purchase price, and current value of each item to give you an accurate understanding of your belongings' worth. This inventory is essential for insurance purposes as it allows you to provide a comprehensive list of items if you need to file a storm damage claim and can assist your insurer in calculating your reimbursement.
Step-by-Step Guide to Creating a Home Inventory
Step 1: Choose a Method
There are several methods to create your home inventory, from old-fashioned pen and paper to modern smartphone apps. Choose the method that works best for you and ensures you can easily update it as needed.
Step 2: Go Room by Room
Start by taking inventory of one room and move on to the next. Identify and document all the possessions in the room, including furniture, appliances, electronics, and personal items.
Step 3: Record Details
For each item, record the make, model, serial number, purchase price, and date of purchase if possible. Additionally, take photographs or video footage of each item to provide visual documentation of the condition of the objects.
Step 4: Update Regularly
Ensure that you regularly update your inventory list whenever you make new purchases or get rid of existing items. Keep all receipts for significant purchases, as these can be used to verify the value of the item.
Step 5: Store Securely
Store your home inventory list and any corresponding documentation, such as receipts and photographs, in a secure location, either in a safe deposit box, cloud storage, or a fire-proof safe.
Understanding Storm Damage Claims
After a storm emergency, it's common to experience damage to your property and belongings. To receive compensation for the damage, you should file a storm damage claim with your insurance company. When you file a storm damage claim, the insurer assigns an adjuster to assess the damage and determine the appropriate compensation based on your policy.
It's essential to review your insurance policy and understand what is covered and the limits of the coverage before filing a claim. Some policies may have exclusions or limitations that you should be aware of. Also, keep in mind that deductibles vary and will impact the amount of your reimbursement.
After filing a claim, the adjuster will arrange for an inspection of the damage to your property and assess the value of the loss. They will then use the information you provided in your home inventory list to calculate the value of your belongings to determine the reimbursement amount.
In conclusion, creating a home inventory is a crucial component of any storm damage plan. By documenting your possessions and their values, you can ensure that you receive fair compensation from your insurance company in the event of storm damage. It's essential to regularly update your inventory and to store it securely. If you experience storm damage to your property, contact your insurance company immediately and provide them with your home inventory and documentation to expedite the claims process. At SERVPRO®, we are here to help with any storm damage cleanup and restoration needs.
The Importance of Cleaning Upholstery after a House Fire
4/17/2024 (Permalink)
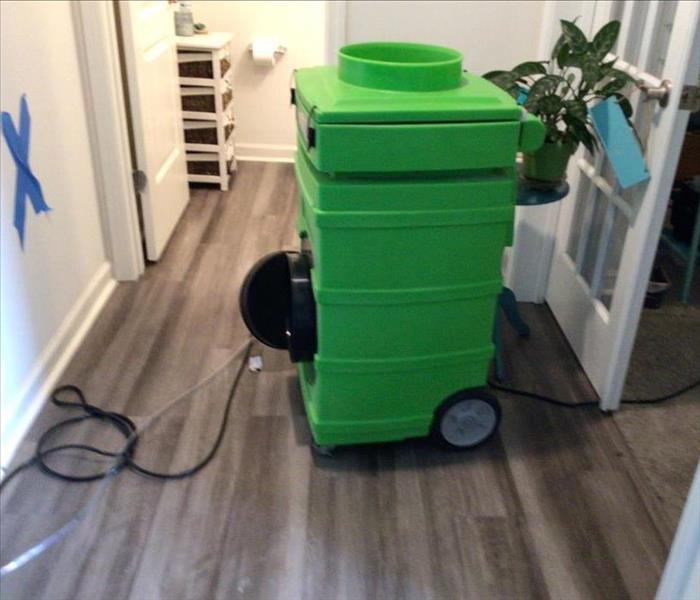 In this blog, we will explore the importance of cleaning upholstery after a house fire and how to clean it effectively.
A house fire can be a traumatic experience, leaving behind extensive fire damage and smoke damage restoration needs. One of the most overlooked aspects of fire remediation is cleaning the upholstery in your property. After a fire, your upholstery may absorb smoke and soot, leading to a persistent odor and damage. In this blog, we will explore the importance of cleaning upholstery after a house fire and how to clean it effectively.
Upholstery Absorbs Smoke and Soot Particles
During a fire incident, smoke and soot particles can permeate every surface on your property, including your upholstery. Smoke and soot particles can seep into the fabric, leaving behind a persistent odor and staining. In addition to being unpleasant, this can lead to further fire damage if not addressed appropriately. To prevent long-term damage and ensure efficient smoke damage restoration, it is crucial to clean your upholstery after a fire.
Preventing Health Issues
Upholstery damaged by fire and smoke can pose a health risk if not cleaned thoroughly. Smoke and soot particles contain harmful chemicals and compounds that can harm your health if inhaled or absorbed through the skin. By cleaning your upholstery after a house fire, you can prevent these health issues, ensuring a safe and healthy environment for you and your loved ones.
Effective Upholstery Cleaning Techniques
Cleaning upholstery after a house fire involves specialized techniques that differ from regular cleaning methods. The first step in upholstery cleaning is to loosen and remove dry soot particles. This can be done by gently vacuuming the surface using an upholstery attachment. Professional fire remediation technicians use specialized techniques like dry cleaning sponges, chemical sprays, and hot water extraction to remove soot and smoke stains.
Professional Fire Remediation Services
Fire damage upholstery cleaning can be a complicated and challenging process that requires professional expertise and experience. Fire remediation technicians from companies like SERVPRO® use industrial-grade equipment and specialized techniques to clean and restore damaged upholstery effectively. They also use deodorizing agents that neutralize the odor left behind by smoke and soot particles, resulting in long-lasting freshness and cleanliness.
Prevention of Further Damage
The longer you wait to clean your upholstery after a fire, the more extensive the damage can become. Soot and smoke particles can cause permanent staining and discoloration, leading to the need for complete upholstery replacement. By addressing the fire damage upholstery promptly, you can prevent complete replacements and save on repair costs.
Fire damage upholstery cleaning is a crucial aspect of any fire remediation process that should not be overlooked. Upholstery can absorb smoke and soot particles, leading to health risks and damage to the property. Professional fire remediation experts like SERVPRO® have the expertise, experience, and specialized equipment to clean and restore your upholstery effectively, ensuring your property is clean, safe, and healthy. If you experience a fire incident, contact the professionals at SERVPRO® who can promptly respond, assess the damage, and provide efficient smoke damage restoration and fire damage cleanup services, including upholstery cleaning.
Mold and Renovations: Tips for a Mold-Free Makeover
3/13/2024 (Permalink)
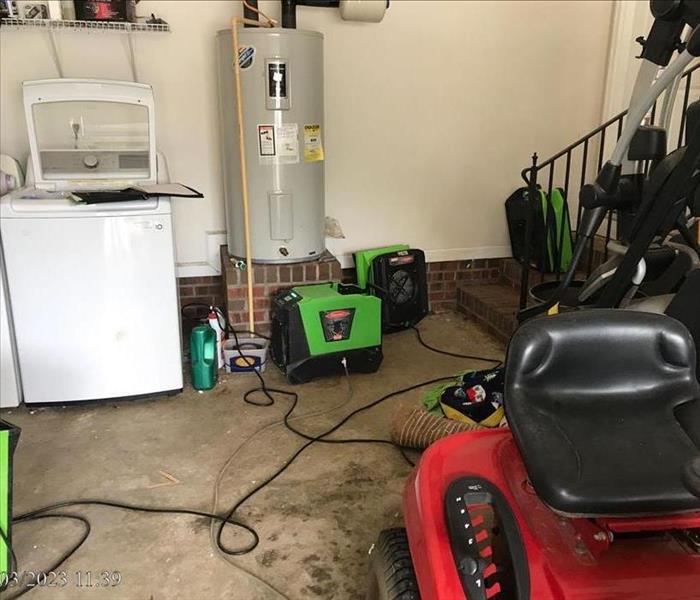 In this blog, we will explore tips and steps to ensure a mold-free makeover for your home.
Renovating your home can be an exciting and rewarding experience. However, it is essential to be aware of potential mold issues that may arise during the renovation process. Mold damage can be a common occurrence during home renovations, especially if moisture sources are disturbed. In this blog, we will explore tips and steps to ensure a mold-free makeover for your home.
Before Starting the Renovation
Here are a few steps to take before beginning your renovation:
- Inspect for Existing Mold: Before beginning any renovation, thoroughly inspect your home for any signs of mold. Look for discoloration, musty odors, or any visible mold growth. If mold is found, it is crucial to address it and carry out mold remediation before proceeding with renovations.
- Address Moisture Issues: Identify and address any potential moisture sources in your home, such as leaks or inadequate ventilation. A dry and moisture-free environment is essential for preventing mold growth during renovations.
- Plan Proper Ventilation: Ensure proper ventilation in areas where renovations will occur. Well-ventilated spaces help maintain adequate air circulation and prevent excess humidity, reducing the risk of mold growth.
During the Renovation Process
- Containment Measures: If you are making changes in areas where mold is present, it is important to implement proper containment measures. This can include using plastic sheeting to isolate the work area and setting up negative air pressure machines to prevent mold spores from spreading to other parts of the home.
- Moisture Control: During renovations, avoid creating excess moisture. Ensure that water sources are properly sealed off and that surfaces are kept dry. Wipe up any spills promptly, and use dehumidifiers or fans to control humidity levels.
- Proper Removal of Mold-Infested Materials: If mold is found during renovations, it is crucial to remove mold-infested materials properly. Doing so reduces the risk of spreading mold spores and prevents further contamination.
- Effective Cleaning: Clean the renovation area thoroughly, especially after any mold removal. Use appropriate cleaning techniques and antimicrobial products to eliminate any remaining mold spores and ensure a mold-free environment.
After the Renovation
- Final Inspection: After renovations are complete, perform a final inspection to ensure that there are no signs of mold or moisture issues. Look for any signs of water damage, discoloration, or musty odors. If any issues are identified, address them promptly to prevent mold growth.
- Maintain Proper Ventilation: Maintain good ventilation and airflow throughout your home even after renovations are complete. This will help prevent excess moisture buildup and reduce the risk of mold growth.
- Regular Maintenance: Regularly inspect your home for any signs of water leaks, moisture buildup, or mold growth. Address these issues immediately to prevent further damage and keep your home mold-free.
Professional Mold Remediation
If you encounter significant mold damage or are unsure of how to properly address mold during renovations, it is recommended to seek professional mold remediation services. Professional mold remediation experts have the knowledge, experience, and specialized equipment to handle mold issues effectively and safely.
Renovating your home can be an exciting process, but it is essential to be mindful of potential mold issues. By following the tips and steps provided, you can help ensure a mold-free makeover for your home. Proper inspection, addressing moisture issues, implementing containment measures during renovations, effective cleaning, and ongoing maintenance will help prevent mold growth and maintain a healthy living environment. Consider seeking professional mold remediation services for any significant mold damage or if you are unsure how to handle mold during renovations.
Emergency Steps to Take After Burst Pipes
2/14/2024 (Permalink)
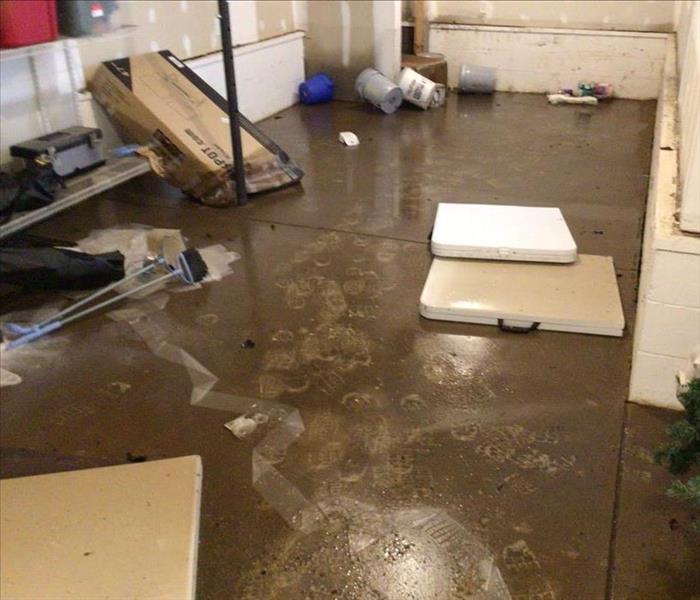 With these emergency actions in your toolbag, you'll be better equipped to tackle burst pipes head-on and protect your home from extensive damage.
Burst pipes are the unwelcome guests that can turn your home into a wet disaster. To be prepared for a pipe burst event, let's dive into the essential emergency steps you should take. Quick response is the name of the game, and here's your playbook.
1. Shut Off the Water Supply
When faced with burst pipes, your immediate action should be to locate and shut off the main water supply. This crucial step halts the flow of water and prevents further damage. The main shut-off valve is typically located near the water meter or where the main line enters your home. Familiarize yourself with its location beforehand to save precious time during an emergency.
2. Electricity Off, Safety On
Water and electricity don't mix well. To ensure your safety, turn off the electricity supply to the affected area or the entire house if necessary. This precautionary step helps prevent electrical shocks and minimizes the risk of electrical fires. Remember, safety first!
3. Open Faucets
Once you've shut off the main water supply, open all faucets in your home. This helps release any remaining water and reduces pressure in the pipes, mitigating the extent of the damage. Don't forget to flush toilets to drain water from the tank and bowl.
4. Identify the Source
Track down the source of the burst pipes. This might require a bit of detective work, but identifying the specific location of the damage is crucial for effective repairs. Look for visible leaks, water stains, or bulging areas on walls and ceilings.
5. Call in the Professional
While quick actions can minimize immediate damage, it's essential to call in professionals to assess and repair the burst pipes. Experienced plumbers have the expertise and tools to address the burst pipe issue. It is also important to call water mitigation professionals to clean up the mess and restore your property to its original state.
In conclusion, responding to burst pipes requires a quick and systematic approach. Shut off the water supply, secure your electrical system, open faucets to relieve pressure, identify the source of the problem, and don't hesitate to bring in professional help. With these emergency actions in your toolbag, you'll be better equipped to tackle burst pipes head-on and protect your home from extensive water damage.

 24/7 Emergency Service

